"DIY" and "How TO" for an eye
like the one on this beauty seen here.
 |
| Giant Squid replica and prop, Ralph Yeager Roberts |
Materials
- Clear Plastic Acrylic Fillable Ball Ornament (available online or at a craft store and cost about a dollar)
- A rounded plastic disc or large button with a smooth rounded face.
- Polyurethane
- 2 colors of craft paint, acrylic paint, or as used here translucent window or glass paint.
- Reflective paper (The thickness of a file folder or extremely thing cardboard)
 |
| Materials for squid or fish eye, Ralph Yeager Roberts |
Tools
- Scissors
- stick or paint brush
- hot glue gun
1) Pour polyurethane into each of the two halves of an acrylic fillable ornament so that there is a pool of liquid a quarter of an inch deep.
 |
| The paper back glued to the plastic ball, Ralph Yeager Roberts |
2) Place a rounded plastic button or Gem as seen in the picture. The rounded side should face downward with the plastic gem submerged partially or completely in the liquid finish. This disk will create the pupil for your fish or squid eye.
3) Making sure the two halves of the acrylic ball are secure and not going to tilt over set these aside for at least 24 hours. If possible in a warm sunny spot.
4) Be sure the polyurethane has become extremely tacky. If after a day it is still runny you may want to pour some of the liquid out and then check again in a half a day or so. You will still have the eyes turned upside down for at least one more day so if there is still some viscosity to the liquid finish that is fine.
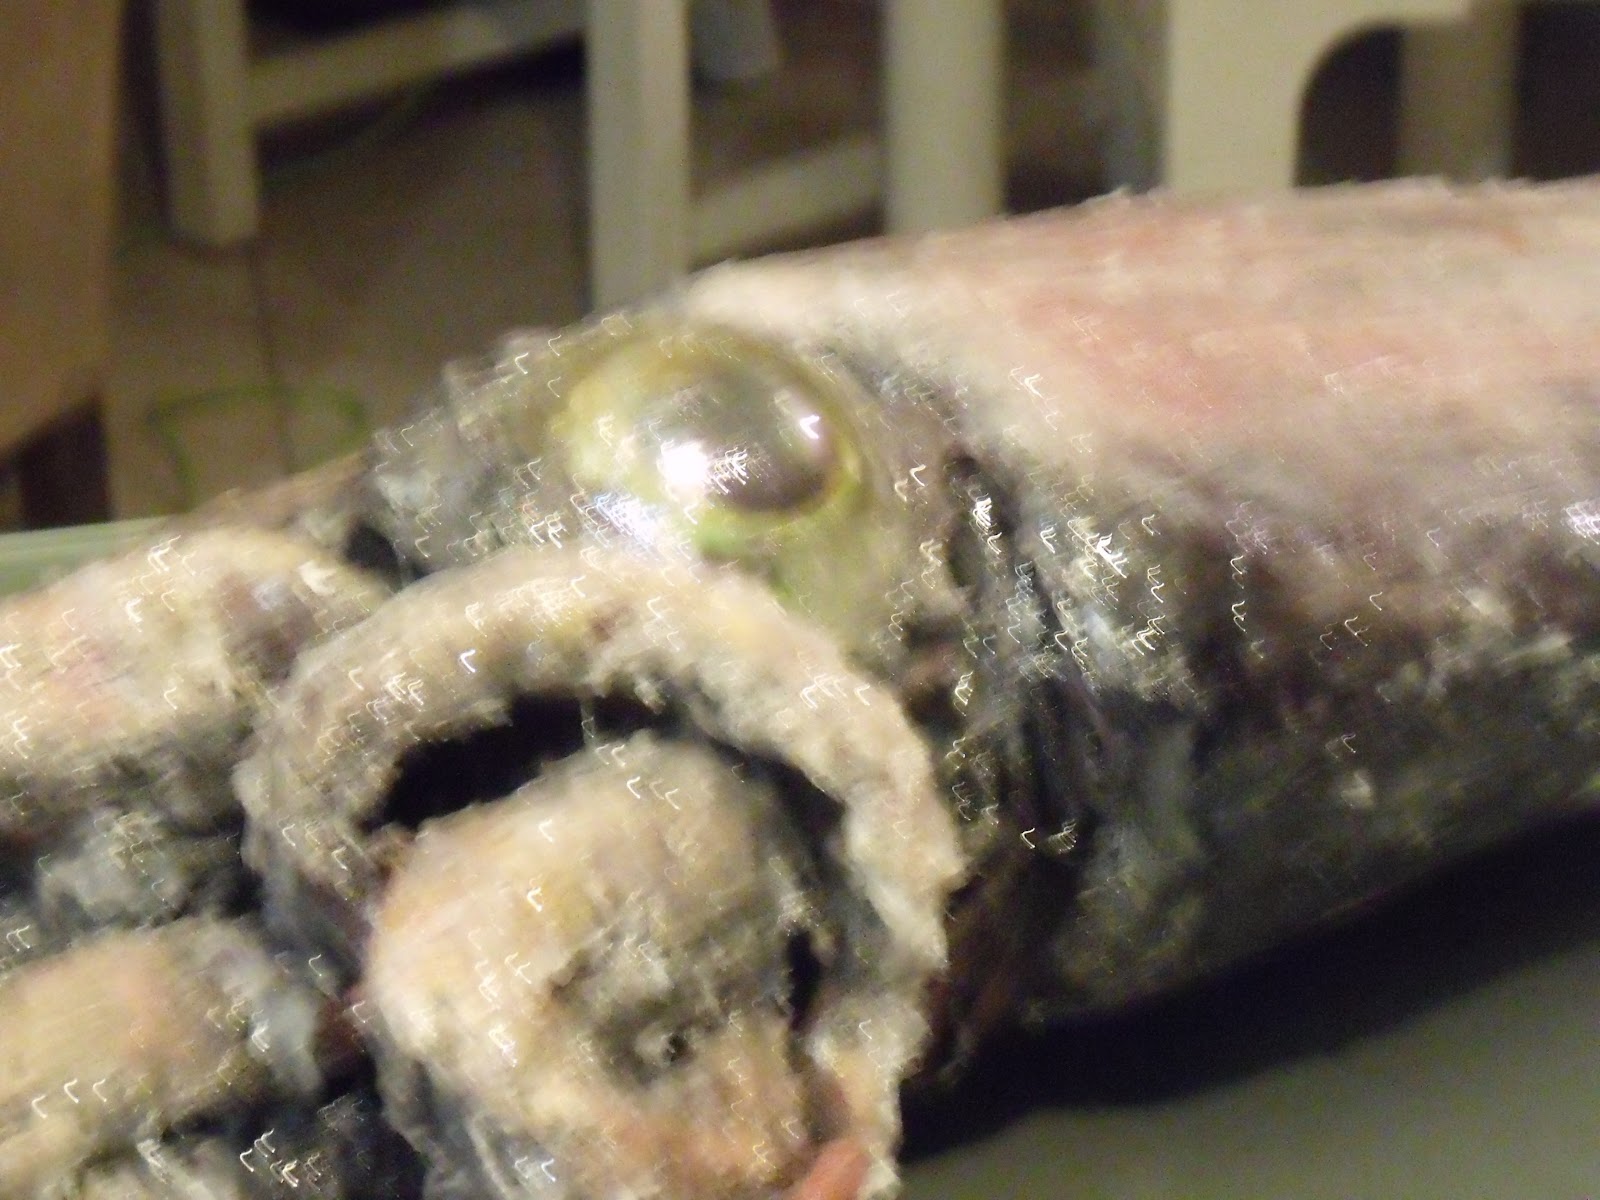
 |
| The eye is ready to add to your larger project, Ralph Yeager Roberts |
5) Select one of the two colors you will use for the next layer of detail to your fish eyes. I chose a blue. I used translucent glass paint commonly used to create a stained glass look on standard panes of glass. I squirt a thin layer of the paint on top of the plastic dusk and polyurethane. It is not critical that this layer make a perfect circle. Fish eyes are often uneven looking as if they have begun to leek or bleed a bit in one spot. After this layer has sat for about an hour repeat the process using your other color selection. Don't worry if these layers mix a bit with each other.
6) After the last layer of paint has had a few minutes to dry find your silver faced card stock or paper. Trace two circles onto the paper the size of each half of the acrylic fillable ball you have been using. Cut out these disks and with the reflective side faced downward glue the paper disks onto the top of your two halves of the ball. This will make a sealed back for each eye.
7) Do not rush to set them on the flat paper side as they will still need a day or so to sit and get firm enough. After the paint and varnish have both dried you can turn your eye over and see how it will look. While a bit of patients is required as each layer sets the result is a cool eye that has a life to it and a dimensionality which will support your illusion and serve to offer realism to your larger creation weather a fish or like I was making a squid. To see more of the squid project select the following link. http://woringwickedness.blogspot.com/2010/11/squid-prop-and-not-for-haloween.html

No comments:
Post a Comment